Waterproofing Membranes Can Fail. Here’s Why it Happens

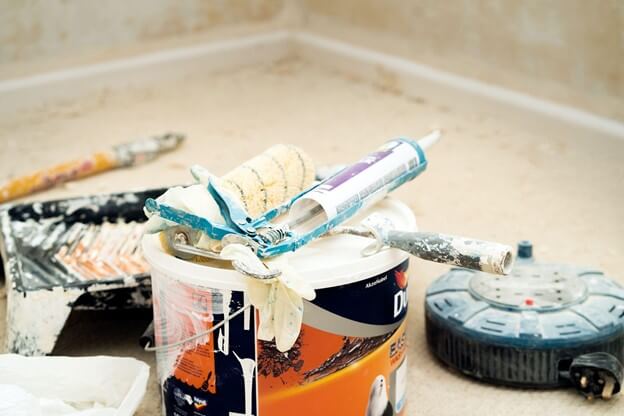
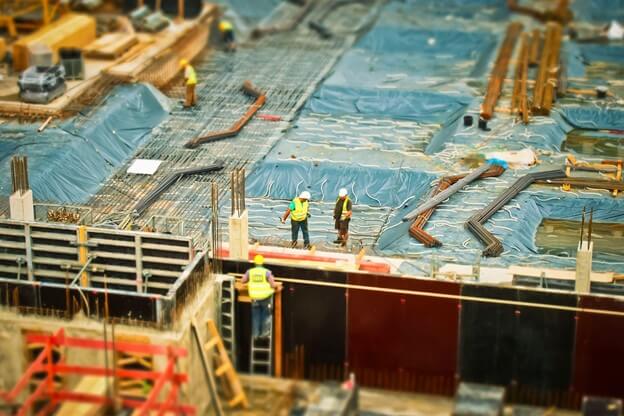
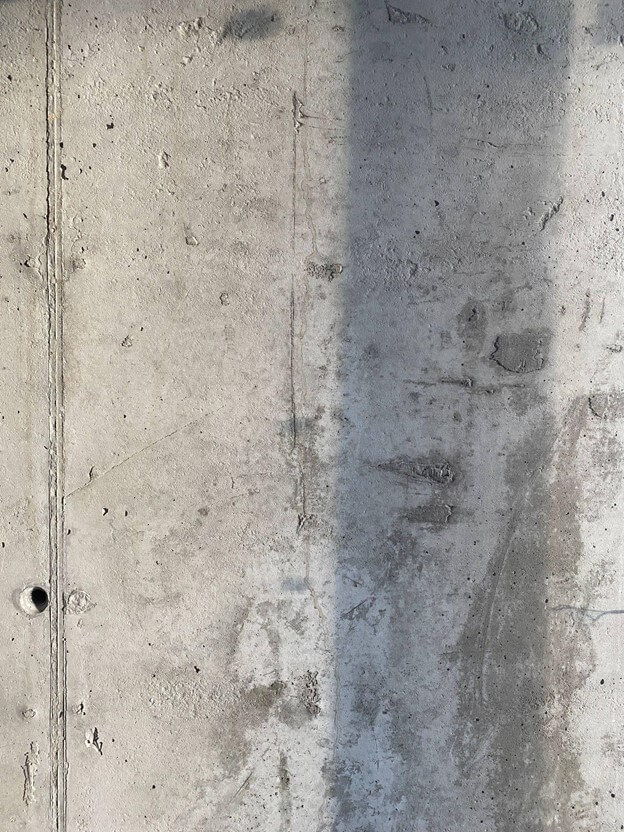
When contractors are waterproofing commercial, or industrial spaces, they often rely on sheet membranes to offer the best possible protection against water. In concrete waterproofing, sheet membranes are applied to either external surfaces. Together the concrete and membrane form a nearly impenetrable barrier.

Despite the double barrier, waterproofing membranes can still fail. Here are some common reasons why.

A failure of skilled application

The application of waterproofing sheet membranes is a very labor intensive task. The workers who apply it need training and experience to do the job well under the best circumstances. However, because it is so dependent on labor, this is where the failures occur. Some estimates suggest that poor workmanship alone accounts for 90% of all waterproofing membrane failures.

Debonding can be caused by several factors, including application to an uneven surface or to a wet surface. Application to contaminated surface, lack of primer, or insufficient priming of the surface prior to installation of the waterproofing sheet membrane can lead to debonding.

Further, insufficient coverage or uneven application of a membrane prevents establishing a uniform thickness of the waterproofing layer. This can result in the failure of the application as thinner parts of the membrane get damaged quicker, not fully bonding overlaps pose potential breach of the waterproofing layer. Membranes can then come apart at the seams  and allow water to penetrate.

Companies can overcome this with training, experience, and teamwork. Everyone needs to do this the first time, so experience alone isn’t the answer. But careful oversight can prevent catastrophe.

Choosing the wrong components

Choosing the wrong membrane, using the wrong items for the intended application, or matching the membrane with the wrong substrate can lead to the failure of the waterproofing application.

In matching the selected membrane with primers, it is important to select complementary products. Failure to do so can lead to an unbonding of the membrane and failure of the waterproofing. Unbonding is when the sheet membrane no longer forms a watertight seal with the concrete, allows water migration between the membrane layer and the concrete.

To mitigate this problem, sheet membranes for underground waterproofing applications must meet international standards. Choosing from EPDM, TPO, or PVC membrane types is important, but selecting the right primers allows the sheet membrane to be fully mechanically adhered to the substrate, however these might not be the right combination for below grade applications.

Another common problem is blister. Blister is caused by insufficient prime at the surface. As a result, trapped air builds up under the membrane causing debonding and blistering. These blisters are prone to puncture and then result in a breach of the waterproofing layer allowing water to pass through to the concrete. Waterproofing sheet membranes are exposed to a high risk of damage.

Often this damage occurs in the subsequent stages of the construction schedule. Both puncturing and tearing represent a breach of the waterproofing layer and thoughts of failure.

The effects of time

Many waterproofing membranes deteriorate over time, due to exposure to UV rays, harsh environments, aggressive groundwater, or permanent ponding leading to the disintegration of the waterproofing layer. Ultimately this leads to the failure of the membrane.

In conclusion, membranes are not recommended for certain types of projects. Efficient and long lasting waterproofing solutions require newer technologies that permanently reduce permeability and improve concrete properties and durability.

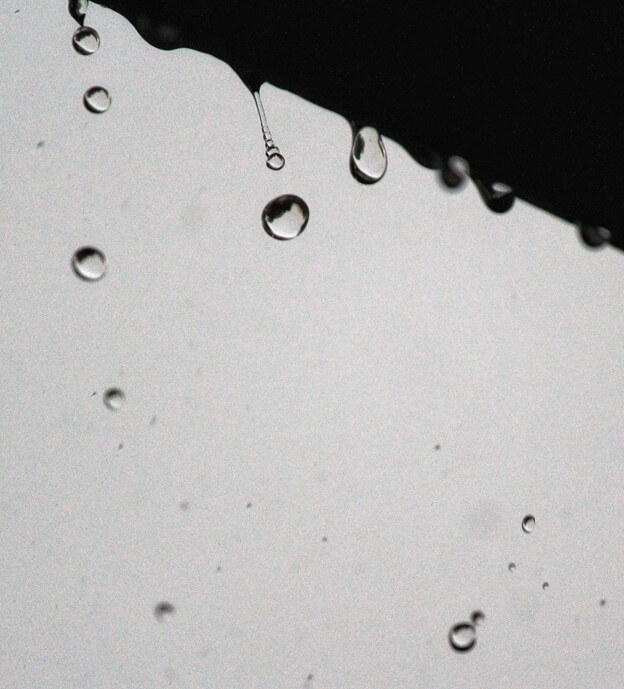
Photo by Holly Obermiller on Unsplash


What is Hydrostatic Pressure?

Technically speaking, hydrostatic pressure is

“The pressure exerted by a fluid at equilibrium at a given point within the fluid, due to the force of gravity. Hydrostatic pressure increases in proportion to depth measured from the surface because of the increasing weight of fluid exerting downward force from above.” – Dictionary.com

But what does this mean for someone doing a construction project? What forces does a construction manager (or industrious home do-it-yourselfer) have to consider when waterproofing below-grade or even below-water walls and foundations?

This means, in part, that a product simply being water-repellant or even waterproof in common testing in a laboratory is not the same as that product keeping out water in a wall or foundation that will be exposed to water.

How does hydrostatic pressure impact waterproof surfaces?

Hydrostatic pressure is not constant in a given spot over time. This is because the nature of hydrostatic pressure means that it changes based on the depth of the water.

Why? There are two variables at work. First is the water itself. Second is the depth of the water or, more precisely, the pressure exerted by the weight of all the water above it.

You have experienced this pressure before if you have ever dived into deep water, like the deep end of a pool, or if you have gone a few body lengths below the surface when snorkeling or scuba diving.

If you have done those things, you have felt hydrostatic pressure against your eardrums. The additional pressure of the weight of the water above compressed your ear drum. At first it just muffled the sounds, but then, if you dove deep enough, the pressure even may have caused some pain.

This increased pressure works against your waterproof eardrum membrane in much the same way as it works against a waterproof wall membrane.

Eventually, if the water gets deep enough and the pressure gets high enough, the pressure causes a fissure or rupture.

Or, even if there is not a large leak, water can still be forced through the tiny pores and pockets that are part of a concrete pour. Over time, this water gets forced in and adds to the degradation of the wall and the foundation.

This is why your building project must account for water around the foundation. And it must take into account the effects of hydrostatic pressure.

Photo by David Bartus from Pexels

Waterproof Construction Adhesive

For your next construction project, you want to select adhesive products that are up to the task. That is, they need to be able to withstand the forces they are going to face over the lifetime of the finished product.

They will also need to bond well with the materials being used in the project.

Your favorite adhesive from your favorite company or supplier is unlikely to be the best solution for every project. And if the contractor you use seems to have a “one adhesive” approach to all of their work, it might be wise to look around for a company that approaches each project with the best possible tools and resources.

Your professional Mar-Flex supplies will include or suggest the right waterproof construction adhesive for the project.

What to consider when choosing construction adhesive

  1. Surface type. Construction materials differ from one another on a molecular level, and thus different adhesives will work better with different materials. The best construction adhesive will be formulated to work well with both sides of your project. For instance, if you are adhering glass to metal, you will use a different adhesive than when waterproofing stone against concrete.
  2. Drying time. Often waterproof construction adhesive instructions include two times: a drying time and a curing time. The drying time is the time it takes for the chemicals that make the adhesive pliable to evaporate. This is simply when the product becomes unable to move or ben, but it is NOT when it is fully set. The curing time is the time it takes for the remaining ingredients to crystallize and become fully active in waterproofing and bonding. Only after a product has cured is it ready to do be exposed to the elements and daily use.
  3. Strength and longevity. Strength of an adhesive is scientifically measured by two different measures, based on the two ways an adhesive might be stressed. One is lap shear, or how the waterproof adhesive holds up when the materials around them want to move laterally against the glue and/or the other surface. This is extremely important if the waterproofing adhesive is being applied to vertical surfaces. (Note: when possible, adhesives should not be the ONLY thing holding up vertical building materials.) The second measure of strength is peel strength, or how the adhesive holds up against perpendicular stress, as if someone is pulling the two surfaces apart.

Cleaning up and following directions

A good construction project is only as solid as its weakest link, material, or construction shortcut. So reading the instructions and getting the right material for your waterproofing project is important. Work with an expert supplier to make sure your products match the results you want.

What is Backfill Saturation and How Can it Ruin Your Building Project?

Every builder and owner dreams of a dry foundation, with water effectively repelled from the outside, and no seepage, dampness, or water intrusion for the history of the project.

In reality, this is a very challenging standard to try and meet. A construction manager faces multiple obstacles in defeating his nemesis: water.

Fortunately, through a combination of construction techniques, approaches, and materials, we know there are a lot of avoidable mistakes. One such obstacle is backfill saturation. If backfill is poorly done, and the foundation incorrectly prepared, backfill saturation can defeat even the stoutest of waterproofing materials.

What is backfill?

When builders dig the hole for a building project, they are often disturbing soil that has sat and compacted in one place for decades or maybe even centuries. The impact of time, the elements, and pressure has often compacted the soil into almost unworkable solid clay.  This clay is hard for water to get through, because time and pressure have closed all the small crack, while the water itself carried away the loose soil and gravel.

Clay repels water.

However, when the hole is dug for the new home, this clay and other materials are set aside to use later to fill in the hole around the completed foundation. This fill-in material is called “backfill.” It is the “fill” you put “back” in around your completed foundation.

Why is backfill saturation a problem?

This backfill might include the same clay that was originally in the foundation space, but there is now a key difference. It has been dug up and moved multiple times. Instead of being a solid, water-repelling block of clay, it is now filled with holes, channels, and cracks through which water can run.

No matter how you pound it down, it won’t be as waterproof as the clay around it that was not disturbed in the building process.

Water will naturally run to this new basin, and saturate it. This is backfill saturation.

This water, if not appropriately accounted for, will then sit against the new foundation of your building project. The lower it is, the more pressure it will exert, and over time it will seep through the tiniest cracks and airholes into your structure.

Make sure you or your construction manager account for backfill saturation in the plans for your next project.

Armor for Your Basement

Every day, hidden from view, your foundation is doing battle. It is fighting the hidden forces of water, pressure, and time.

If you were a general, you would not send your troops into battle without equipping them with sufficient armor to protect them. Why would you do that to your foundation?

At Mar-Flex, we know the forces your foundation is up against. And, more importantly, we know the right equipment and materials to use to help your foundation win the battle every time.

With our Armor series of waterproofing resources, you can be sure that your basement and foundation remain dry.

Armor Air Barrier

The Mar-flex ArmorAir Barrier permeable air barrier system is designed to stop air infiltration and exfiltration in the building envelope. It also allows the transmission of water vapor, preventing condensation in the wall assembly.

ArmorFlash Transition Strips

Transition strips create impermeable barriers which protect vulnerable areas like joints, edges, and corners between barrier materials from the water.

Armor Foundation Membranes

Water-based and solvent-based membranes help keep your foundation protected from both dampness in the ground and from running or standing water against your foundation. Pick from a range of options to fit your needs to your solution.

ArmorClay Bentonite

Bentonite clay expands when wet, absorbing several times its weight in water and makes for a very stable, below-grade solution. The Mar-Flex Bentonite clay membrane uses nature’s own waterproofing techniques against it, protecting your project from damage.

Armor drainage board and tile

With a wide range of drainage board and tile options, Mar-Flex offers your project increasing damp-proofing and waterproofing options. Additionally, our products might help you achieve your desired LEED status.

Look through the options and talk with one of our knowledgeable staff members today.

When you are at war with water, you want to make sure you have taken every possible precaution in order to triumph. The Mar-Flex Armor Series of solutions can help make that happen. With solutions that undergird, surround, and line your building project, you can be sure to create a dry, sound foundation that lasts for years to come.

You can trust that with our expert installers and full warranty, we will not only do the work, but we will also stand behind it. That is the level of service and commitment to quality you can trust.

How Much Does it Cost to Waterproof A Basement?

With a wide range of variables in any building project, no single article can answer exactly how much it costs to waterproof your basement in your home, office, or other building.

That answer must come from a licensed waterproofing contractor or company who has examined your site and knows the specific dimensions and topography of the space.

But you can prepare for getting this kind of estimate by considering some of the variables in advance.

Size

What is the size of the space that you want to waterproof? Knowing the dimensions will help your contractor come up with an estimate. This includes not just square footage, but the depth of the space to be waterproofed.

Location

Location matters in real estate and in waterproofing. This is because it can determine whether the work can be done from outside the structure (if neighbors are far enough away to move equipment in) and how long that work will take.

Also it matters whether the soil around your basement is soft and loamy or mostly clay or even rock.

Hills, elevation, and local water management infrastructure will also play a role in the waterproofing plan. Will the contractor have to manage the water all the way to a city-maintained runoff? Or is it simply a matter of deflecting and redirecting water to naturally occurring hills and creeks? The less water management that needs to be done, the better.

New build or existing property

Another important factor in pricing your waterproofing project is whether you are doing a new build or waterproofing an existing property.

In a new build, there is significant opportunity to do things well and not have to address waterproofing and water control for a generation or more. With intentionality and investment, water can be directed away from the foundation, and whatever water remains can be controlled and kept at bay easily.

If you are waterproofing an existing structure, there are significant hurdles to be considered. It is challenging (or expensive) to expose the entire foundation for treatment, and sometimes the placement of other buildings makes this impossible. This doesn’t mean it can’t be done, it just means that more of the waterproofing work might have to happen from inside.

Quality and kind of materials

Finally, your waterproofing experience will be affected by the kind of materials you want to use. If you are pursuing LEED certification, or if you are simply seeking to build and live in a sustainable way, you might have to figure in some increased costs for recycled products (though these prices are now often quite competitive).

Another factor will be the quality and durability ratings of the work. Your specifications will help contractors and builders determine exactly how durable their products will be – and you will almost always pay more for the better longer-term solution.

Photo by Jill Burrow from Pexels

How to Apply Crystalline Waterproofing

Crystalline waterproofing materials remain a terrific way to protect your basement walls from the damage that water does by penetrating and freezing in your foundation.

In this process, crystalline waterproofing material is brushed onto basement walls. Here it penetrates the concrete cavities and forms a strong bond. This changes the porous concrete into a waterproof solid.

This process is most effective in a wet basement where water seepage is a problem.

One significant advantage of this material is that installation is straightforward and can be accomplished by any do-it-yourself homeowner.

Step 1: Cleaning

Before you begin application, you must completely clean the concrete wall surfaces. The crystalline waterproofing material will only adhere to the concrete surface if it is free from any other debris or dust. Use a wire brush to remove loose concrete or paint. A hammer and chisel may be needed for large pieces of concrete that are loose but can’t be brushed off. If there are multiple layers of paint that cover a wide area, you could try power washing the surface or even sandblasting it.

Step 2: Preparing

The next step is to repair your concrete surface by filling large cracks. Using concrete patch or liquid concrete in a tube, spread it over the surface with a trowel. Fill the crack completely and let it dry and set before doing anything else to the surface.

Step 3: Priming

Next you will prime the concrete for the crystalline waterproofing by thoroughly wetting the surface of the concrete with water. You don’t want to soak the area, but it should be damp, which will actually help with spreading and adhering the waterproofing substance.

Step 4: Mixing

In a bucket, you should mix the crystalline waterproofing material with water, according to the instructions. Apply just enough water so that the material becomes a thick paste.

The chemical process of the water and the material will cause the substance to warm. This is a natural and expected process, and evidence you are doing it correctly.

Photo by Yuriy Pavlov on Unsplash

Step 5: Applying

Using a masonry brush, apply a thick coating of the paste to the concrete wall. Make this coat thick but even.

Step 6: Curing

Once the crystalline waterproofing material is applied to the surface of the concrete, you must keep it wet for at least 48 hours. Lightly spray it with a misting bottle. This allows the materials to penetrate into porous concrete. If it sets too quickly, it won’t combine correctly and you will have wasted your time.

Liquid Waterproofing Products

Builders, contractors, homeowners and home repair enthusiasts know they have a range of options available when it comes to waterproofing.

And while waterproofing in advance is always the best, by changing the landscape and providing physical paths for the water to take before it ever reaches your foundation, sometimes that option is not available.

When you need a specialty repair or an emergency fix to stop water from entering your space, sometimes what you need is a liquid waterproofing product.

When liquid waterproofing products work best

While a solid barrier between you and the water is almost always the best bet, sometimes it just isn’t an option. For these occasions, thankfully there are lots of good options for liquid waterproofing.

Use liquid waterproofing products to patch a crack

The first, most obvious use of liquid waterproofing products is to patch a crack in a below-grade wall in your home or business. The ease of application is the most appealing reason to use a liquid waterproofer here. You can trowel in the liquid or, in many cases, apply with a caulking gun to completely fill the crack.

Using a liquid waterproofer allows you to create a full seal and reach deep into the crack, providing a more secure barrier against water.

Use liquid waterproofing to seal a driveway

Your driveway needs to be waterproofed too. In this case it doesn’t mean keeping water off the driveway, but it does mean keeping water from getting inside your asphalt or concrete.

Once inside your drive, water can expand when it freezes and speed the deterioration of your huge investment. Using a liquid sealant allows the waterproofing to permeate the entire crack, protecting from the top and from the bottom, as far as the sealant reaches. This creates a more effective patch.

Use liquid waterproofing as a final coat

Some contracts, and some contractors, like to take a thorough approach to completing a waterproofing job. That means adding a final layer of waterproofing for security, even when there are already sufficient layers of waterproofing in place.

In this case, a thin coat of sealant applied to the outside of the below-grade wall helps protect the barriers behind it.

Use liquid waterproofing to spray where you can’t reach

In rare occasions, a breach is too complicated to reach, or too expensive. In this case, a spray-adhesive sealant can work more efficiently. With the right tools and application techniques, it can work as effectively as other barriers, while saving time and effort exposing the problem area to larger tools.


Common Problems with Window Wells

Window wells are an important part of creating a livable basement. They allow daylight and fresh air into your basement, keeping it from being dark and dungeon-like. Additionally, they reduce the ways that water can get into your basement and damage your foundation and possessions.

However, owning and maintaining a window well requires a little bit of knowledge and work.

With this quick quide to problems and solutions with window wells, your window-well owning experience can go without a hitch. And you can keep your basement light and dry all season long.

Window well problem 1: keeping it clean

From dirt accumulating on the sides to the drain keeping water from collecting, keeping your window well clean is the most frustrating and time-consuming concern with maintaining your window wells.

If you have a drain that connects to your foundation drainage system, there are some upsides. First, you can hose down the sides of your window well to get off the regular dust and grass clippings that accumulate over time.

On the other hand, you must periodically clear out the drain so that it continues to allow water to flow out. This often involves climbing or reaching into your window well to sweep or vacuum out debris from the grate.

Window well problem 2: small animal rescue

Another problem with window wells is that they often capture unsuspecting creatures. Depending on your location and the time of year, window wells can trap frogs, rabbits, snakes, and other local wildlife.

Fortunately, some window wells are built to handle these situations, and they have stairs or ridges in them that allow animals to safely exit the well.

In other cases though, the best defense is someone from your home periodically checking the window wells and taking the proper steps when an animal is trapped.

Woodchuck trapped in a window well. From Youtube.

What are the proper steps to release an animal from your window well? It definitely depends on the animal.

Window well problem 3: flooding or breaking

A poorly installed or old window well might become susceptible to taking on more water than it can handle. This happens when water is directed into it from an outside source, or when groundwater flows through a broken window well boundary.

In this case, your window well puts your foundation and your basement at risk.

Only the hardiest of fix-it-uppers can handle this repair yourself. If the window well is causing more problems than it is solving, call a waterproofing expert.

What Are The LEED Levels And What Do They Mean?

By now we are all familiar with the LEED certification for buildings. Designers, builders, and architects all strive together to earn the highest possible Leadership in Energy and Engineering Design ratings and brag about them to prospective investors. Press releases include the grades of new buildings, and tenants boast of their LEED scores as they show around their own employees or clients. Projects with the highest LEED scores get local and national attention, and companies boast of their sustainability and eco-friendly buildings.

But what are the rankings, and what do they represent?

Well, there are four rankings for buildings, according to the US Green Building Corporation. Those rankings are certified, silver, gold, and platinum, with certified being the lowest level, and platinum being the highest. They are awarded on a point scale for achievements in certain areas of energy efficiency.

Certified 40-49 points

The first level of attainment for LEED certification is “certified.” Buildings that score between 40 and 49 points are Leed Certified. This means that they have met important standards for sustainability and energy usage in their selection of materials and building design. This is an important designation that shows a commitment to sustainable growth and building.

Silver 50-59 points

The next highest certification is “Silver.” A building that earns this status has invested time, energy, and additional resources to demonstrate their commitment to the environment over time. Through the use of credits, complex credits, and the right building materials and approaches to reduce energy usage, Silver buildings deserve recognition as a monument to sustainability.

Gold 60-79 points

Unlike in the Olympics, “Gold” is the second-highest level of achievement in LEED certification. However, just like in the Olympics, “Gold” status bestows a very high honor. The Gold status is reached only through meticulous care and careful dedication to the LEED standards, and an awareness of resource usage throughout the entire building process.

Platinum 80+ Points

The highest level that can be achieved on the LEED certification scale is Platinum. This is a distinguished level, and shows a rare deep investment in sustainability in every aspect of the building process. According to the USGBC website, fewer than 9,000 buildings in the world have earned Platinum LEED status as of August 1, 2021. These buildings are known locally and internationally to designers and engineers, and they draw additional visitors who simply want to see how this level was achieved.